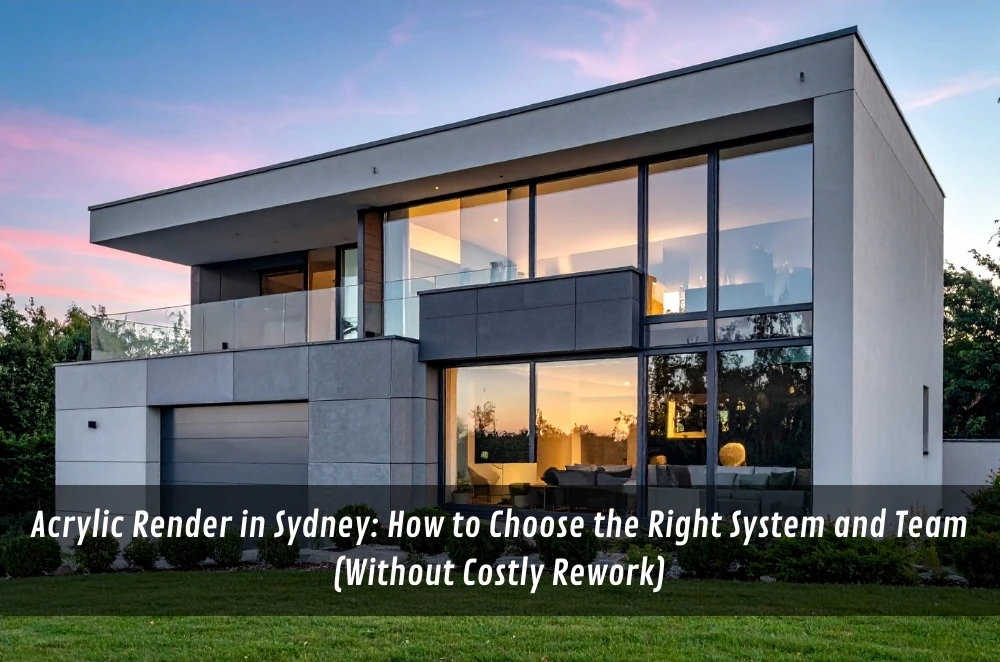
Acrylic render is one of those upgrades that looks “straightforward” until you’re standing in front of a wall that’s half painted, half patched, and full of little surprises.
Sydney buildings love giving you mixed substrates in the same run—old brickwork, newer infill, repaired cracks, and the odd section that’s been sealed three different ways over the years.
If the job goes sideways, it usually isn’t because acrylic was a bad idea; it’s because the wall and the scope didn’t match the system.
What acrylic render is (in plain terms)
Acrylic systems are typically more flexible than straight cement render, which can help when minor movement is part of the building’s normal life.
They’re also popular because they can deliver a consistent texture and colour finish without relying on paint to hide a patchwork façade.
That said, flexibility won’t save a finish laid over unstable paint, damp issues, or a substrate that’s dusty, chalky, or simply not bonded.
Common mistakes people don’t notice until the finish is on
The first mistake is assuming “a quick clean” equals proper preparation, when the real question is whether the surface will actually hold a new system long-term.
The second is treating cracks like they’re all the same, when a hairline shrinkage crack and a moving junction crack need different treatment.
The third is leaving the messy bits out of the quote—masking, protection, grinding back old coatings, priming, beads, mesh placement, cleanup—then acting surprised when variations appear later.
The fourth is trying to lock in a start date without thinking about weather and cure windows, because a rushed coat schedule can show up as patchiness, softness, or early wear.
Decision factors that make a bigger difference than the product name
Start with the wall you’ve got, not the finish you want
Painted masonry, bare brick, blockwork, fibre cement, and lightweight cladding all behave differently, and “looks solid” isn’t the same as “bonds well”.
Map the movement zones
Material changes (old-to-new extensions, window returns, corners) are where problems love to reappear, so it’s worth asking where mesh will be used and why.
Think about exposure like a local
Coastal salt air, wind-driven rain, and hard afternoon sun can all punish detailing, so water paths, caps, drips, and junction sealing deserve as much attention as texture choice.
Get specific about what “smooth” means
If you want a tight, near-level look, the substrate often needs more correction and the labour goes up—no one enjoys learning that after the first coat is already on.
Make the scope boring (that’s a compliment)
A solid scope spells out prep, reinforcement, protection, access, drying time allowances, and what triggers a variation, so there’s less guessing mid-job.
If you’re comparing finishes and you want a practical reference while you’re scoping the job, keep licensed and insured rendering team in Sydney open as you work through wall types and suitability.
Choosing a team without getting buried in sales talk
Confirm licensing and insurance in writing, then spend most of your energy on process: what they’ll remove, what they’ll repair, how they’ll prime, and where they’ll reinforce.
Ask how access will work (ladders vs scaffold), what protection is included for windows, paving, and adjacent finishes, and what the end-of-day site looks like.
A good sign is when a team talks comfortably about constraints—weather, curing, tricky junctions, mixed substrates—because that usually means they’ve dealt with real walls before.
Operator Experience Moment
You can often feel a job drift when “little extras” start stacking up: one more patch that’s hollow, one more section where the paint powders off, one more crack that’s still moving. When the scope doesn’t match what’s on the wall, people rush to keep momentum, and the finish ends up carrying problems it was never meant to solve. The calmest sites are the ones where preparation is priced, planned, and scheduled like it matters.
Local SMB Mini-Walkthrough (Sydney)
An Inner West café refreshes its street frontage after a shopfit.
The wall is mixed: old painted brick, new infill around an entry, and hairline cracks near window corners.
They agree on the finish standard up front so “smooth” isn’t argued on the last day.
The scope calls out paint removal/stabilisation, crack treatment, and mesh at movement-prone junctions.
Access and protection are planned for footpath traffic, glazing, signage, and daily cleanup.
They book a weather window so coats can cure properly instead of being forced through.
Simple first-actions plan (next 7–14 days)
Day 1–2: Walk the site and list every substrate type and junction, backed by clear photos.
Day 3–4: After rain, note water paths, stains, salts, and any spots where moisture seems persistent.
Day 5–6: Write your finish expectation in one sentence (texture + tolerance) and attach it to the scope.
Day 7–9: Get quotes that itemise prep, reinforcement, access, protection, and curing allowances.
Day 10–12: Confirm licensing/insurance and agree on variation triggers and pricing before work starts.
Day 13–14: Set timing around access logistics and weather windows, not just the earliest start date.
Practical Opinions
Prep quality beats “premium” coatings every time.
If the quote doesn’t name the ugly steps, they’ll show up later as extras.
Pick the team that explains limitations clearly, not the one that promises perfection.
Key Takeaways
- Acrylic systems can suit many Sydney façades, but only when the substrate and movement risks are handled upfront.
- Most failures trace back to unclear preparation, vague finish expectations, or rushed curing.
- A “good” quote reads like a method: prep, reinforcement, access, protection, timing, and variations.
- The best results come from reducing unknowns before day one on site.
Common questions we hear from Australian businesses
Q1) Is acrylic always better than cement render in Sydney?
It depends on the substrate, exposure, and how much movement is expected; a practical next step is to identify what your wall is actually made of (and whether it’s painted or patched) and ask for a system recommendation tied to that substrate. In most cases around Sydney’s coastal pockets, detailing and water management influence longevity as much as the render type.
Q2) How do we stop cracks coming back through the new finish?
Usually the win is diagnosing the crack type, reinforcing risk zones, and not overselling the finish standard; a practical next step is to mark cracks on photos and ask how each will be treated (repair method, mesh placement, and junction detailing). In most cases on Sydney refurb sites, old-to-new junctions and window corners need extra care.
Q3) What should be in a proper scope so the job doesn’t blow out?
In most cases the scope should itemise prep (removal/cleaning/repairs), reinforcement (mesh/beads), access and protection, coat build-up, cure windows, and cleanup; a practical next step is to request an itemised breakdown and confirm what triggers a variation if unstable coatings are uncovered. Usually, for footpath-facing Sydney sites, access and protection are where surprises start.
Q4) Can a business stay open while the work is happening?
It depends on foot traffic, dust control, and whether the work zone can be isolated safely; a practical next step is to map operating hours and “no-go” areas and confirm barriers, signage, and end-of-day cleaning. In most cases in Sydney strip-shops and cafés, planning the safe pedestrian path matters as much as the finish itself.


Sign in to leave a comment.