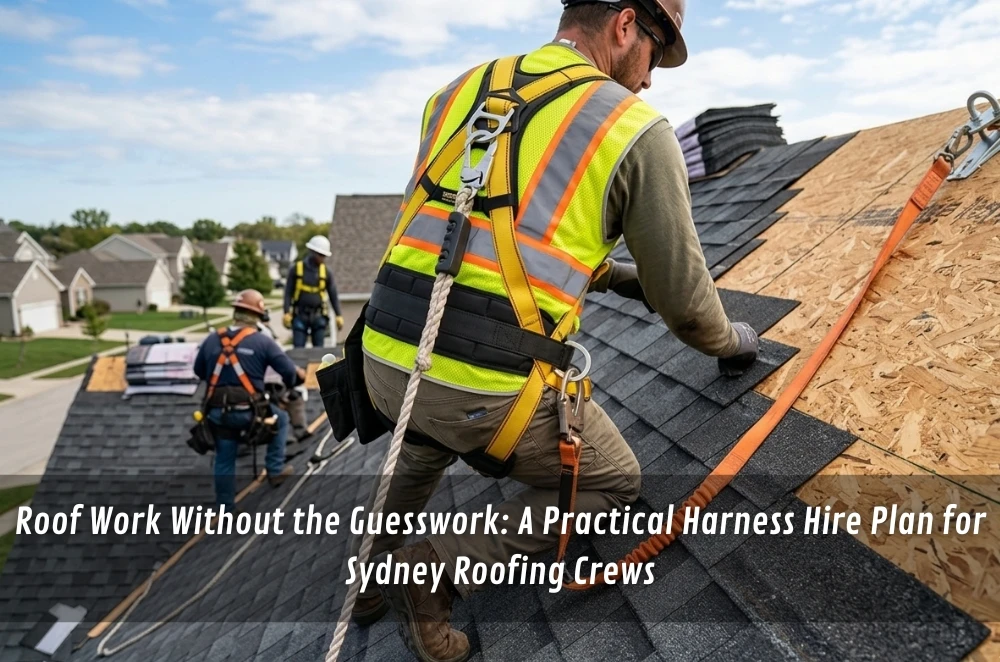
Roof work is one of those tasks that looks routine right up until it isn’t. A small change in pitch, a wet patch you didn’t expect, a ladder that can’t quite land where you planned, or a “quick” repair that turns into a half-day job can push good crews into risky shortcuts.
Most roofing businesses aren’t trying to be careless. They’re trying to keep a job moving while juggling access, materials, weather, client expectations, and whatever the site throws at them. The problem is that fall protection often gets treated as “gear we have” rather than a system you run.
When that system is set up properly, it feels almost boring. That’s the goal: boring, repeatable, and easy to supervise.
Why fall protection breaks down on real job sites
The biggest failures rarely come from one dramatic mistake. They come from a handful of small gaps that stack up: unclear responsibility, a rushed set-up, missing components, or a plan that doesn’t match the roof.
A common pattern is “we’ll sort it when we get there.” On paper it sounds flexible. On the roof, it turns into improvisation—different anchors, different tie-off points, different expectations between the leading hand and the new bloke, and no single moment where anyone confirms the whole system is fit for the task.
Another pattern is the kit that technically exists, but isn’t job-ready. Gear might be in the ute, but lanyards are mismatched, hardware is missing, or inspection status is unclear. The result is delays, substitutions, and quiet pressure to “just get it done.”
Operator Experience Moment: I’ve seen crews do everything right—toolbox talk, clear roles, tidy set-up—then lose 30 minutes because one small connector wasn’t in the kit they grabbed. Nobody wanted to stop work, but they did, because they couldn’t confidently make the system complete. That pause was frustrating, but it’s also the difference between “we think it’s fine” and “we know it’s right.”
What a “site-ready” harness kit should include
A harness kit isn’t one item; it’s the working combination of components that lets a person move, work, and stay protected within the limits of the job.
At a high level, a job-ready setup usually covers four areas:
1) The harness itself (fit and function)
A harness that doesn’t fit properly will be worn loosely, adjusted wrongly, or avoided. Comfort matters because discomfort drives shortcuts.
2) Connection equipment (what keeps you attached)
This might include lanyards and connectors suited to the task and movement needs. The key question is whether the connection method matches how the work will actually happen, not how it looks in a neat diagram.
3) Anchorage approach (where you tie off and how)
Anchorage is where things can get vague fast. “We’ll tie off to that” isn’t a plan unless you’ve verified suitability, placement, and that it works with the intended movement path.
4) Inspection and readiness (confidence, not guesswork)
If no one can quickly confirm gear condition and suitability, the system becomes a debate on the roof—right when everyone wants to move.
One-sentence reality check: a harness kit should arrive as something that can be checked quickly and used consistently, not as a box of parts you have to interpret.
Decision factors: hire vs buy, kit types, and jobsite realities
This is where local roofing fall protection harness hire for Sydney job sites can be practical: it can reduce scrambling for missing components and help standardise what “job-ready” looks like across the week.
Choosing between hiring and buying isn’t only about cost. It’s about how often the work occurs, how many people need gear at the same time, and how reliably the business can keep equipment current, complete, and ready.
When hire often makes sense
- The work is occasional or seasonal, and the kit would sit unused for long periods.
- Different jobs have different roof conditions, so you need flexibility without owning multiple setups.
- You want a predictable “job-ready” bundle rather than piecing together items from past jobs.
When buying often makes sense
- The work is frequent and consistent, and the same set-up applies most days.
- You have a clear internal process for inspection, storage, tracking, and replacement.
- You can standardise training and equipment across the crew.
A practical way to decide is to ask: Which option makes it easier to be consistent on a Wednesday afternoon when everyone’s tired and the wind’s picked up? Consistency is the real ROI.
Before any kit shows up on site, it helps to confirm inclusions and what’s expected for the roof type and the planned movement. If the crew needs a quick way to sanity-check what’s included and what to confirm for the roof type, Conveying & Hoisting Solutions kit inclusions overview can help frame that conversation before the kit arrives.
One-sentence reality check: “We have gear” isn’t the same as “we have a system that matches this roof, today.”
Practical Opinions (exactly 3 lines)
Prefer the option that reduces on-roof decision-making, even if it costs slightly more.
Standardise one “default” setup for common jobs, then vary only when the roof demands it.
Treat missing components as a stop-work trigger, not a problem to improvise away.
Common mistakes that create delays or unsafe shortcuts
Mistake 1: Treating the anchor as an afterthought
The anchor choice and placement shape everything—movement, reach, and whether people stay connected. Plan it early.
Mistake 2: Wearing a harness without a movement plan
If someone can’t reach the work area while staying safely connected, the system will be bypassed. Design for the task, not the photo.
Mistake 3: Mixing and matching components from different kits
This is where compatibility and wear tracking get messy. It also creates confusion about what was inspected and when.
Mistake 4: No “last look” check before stepping onto the roof
A quick, consistent pre-roof check catches loose fit, incorrect connections, and missing items before you’re already committed.
Mistake 5: Assuming everyone understands the same rules
If “tie off” means different things to different people, it’s not a rule—it’s a suggestion. Make expectations specific and repeatable.
One-sentence reality check: most roof incidents begin as small deviations that nobody felt empowered to stop.
The simple 7–14 day plan to tighten up roof-work safety
This plan is built for busy roofing businesses that want a tighter system without turning every job into paperwork.
Days 1–2: Define the “default job”
- Pick one common job type (e.g., standard residential repairs or maintenance).
- Write a one-page workflow: roles, when the anchor decision is made, and the pre-roof check steps.
Days 3–5: Standardise what “job-ready” means
- Decide what must be present every time (minimum components, inspection status, storage).
- Assign ownership: one person accountable for readiness, one person accountable for on-roof checks.
Days 6–8: Run a 15-minute crew practice
- Do a quick fit-and-check routine on the ground.
- Walk through movement: where will the person work, how will they stay connected, when do they reposition.
Days 9–11: Trial it on two jobs
- Use the same routine twice, even if it feels repetitive.
- Note friction points: “we always forget X” or “this roof makes Y impossible.”
Days 12–14: Lock in improvements
- Update the one-page workflow with the friction points.
- Decide whether hire, buy, or a mix makes the system easiest to repeat.
One-sentence reality check: the goal isn’t perfection—it’s fewer decisions made at height.
Local SMB mini-walkthrough: a Sydney roofing crew setting this up fast
A small Sydney crew books a week of mixed repairs: two in the Inner West, one on the Northern Beaches, and a quick call-out in the Hills.
They pick one leading hand as the “system owner” for the fortnight, so checks don’t float between people.
The day before each job, they confirm roof type, access constraints, and where the anchor plan will be decided.
On arrival, they do a five-minute “last look” before anyone steps up: fit, connection, and a clear movement path.
If anything is missing or unclear, they pause early—before ladders go up and tools spread out.
They keep the routine identical across jobs, then adjust only when the roof forces a change.
Making it editor-proof: trade-offs and constraints to acknowledge
Not every roof layout or job type will suit a single approach. Weather, roof pitch, brittle materials, access limits, and client constraints can change what’s reasonable.
Some setups can feel slower at first because they force planning and checks. That time is often recovered by avoiding rework, confusion, and stop-start set-ups once the job is underway.
If there’s uncertainty about suitability or site requirements, it’s smart to consult the relevant safety professional or follow the site’s specific WHS processes before committing to a set-up.
One-sentence reality check: any fall protection approach is only as strong as the crew’s ability to run it the same way every time.
Key Takeaways
- Treat fall protection as a repeatable system: kit readiness, anchor planning, and a consistent pre-roof check.
- Choose hire vs buy based on which option makes consistency easiest on real jobs, not just on paper.
- Plan movement first, then select components that support that movement without encouraging bypassing.
- Build a 7–14 day routine that standardises roles and checks, then refine it on live jobs.
Common questions we get from Aussie business owners
Q1) Do we really need a formal routine if the crew is experienced?
Usually… experience helps, but it can also create “silent shortcuts” when the job is familiar. A simple routine makes expectations consistent across different roof types and different crew mixes. Next step: write a one-page pre-roof check and trial it on two jobs in the next fortnight, which suits the fast pace of Sydney call-outs.
Q2) Is hiring a harness kit better than buying one?
It depends… on how often the work happens and how confident the business is at keeping gear complete, inspected, and ready. Hiring can reduce storage and tracking friction, while buying can work well for high-frequency, consistent jobs. Next step: list the next month’s roof work and mark how often the same setup would apply—Sydney schedules often swing with weather and urgent repairs.
Q3) What’s the biggest thing that causes roof-work safety to fall apart on site?
In most cases… it’s not one big failure—it’s missing components or unclear anchorage decisions made too late. When people realise at height that the plan doesn’t match the roof, bypassing becomes tempting. Next step: make “anchor decision made before stepping onto the roof” a non-negotiable step, especially on tight-access Sydney suburban blocks.
Q4) How do we keep new workers or subcontractors consistent with our approach?
Usually… you need a short, repeatable process that doesn’t rely on memory or personality. A five-minute ground briefing plus a visible checklist helps new people follow the same steps without slowing the day. Next step: run a 15-minute practice session at the start of the week, and keep it aligned with the kind of mixed job sites common around greater Sydney.


Sign in to leave a comment.